Understand your customer's journey
Review the steps your customer goes through when sharing their financial and spend information
Overview
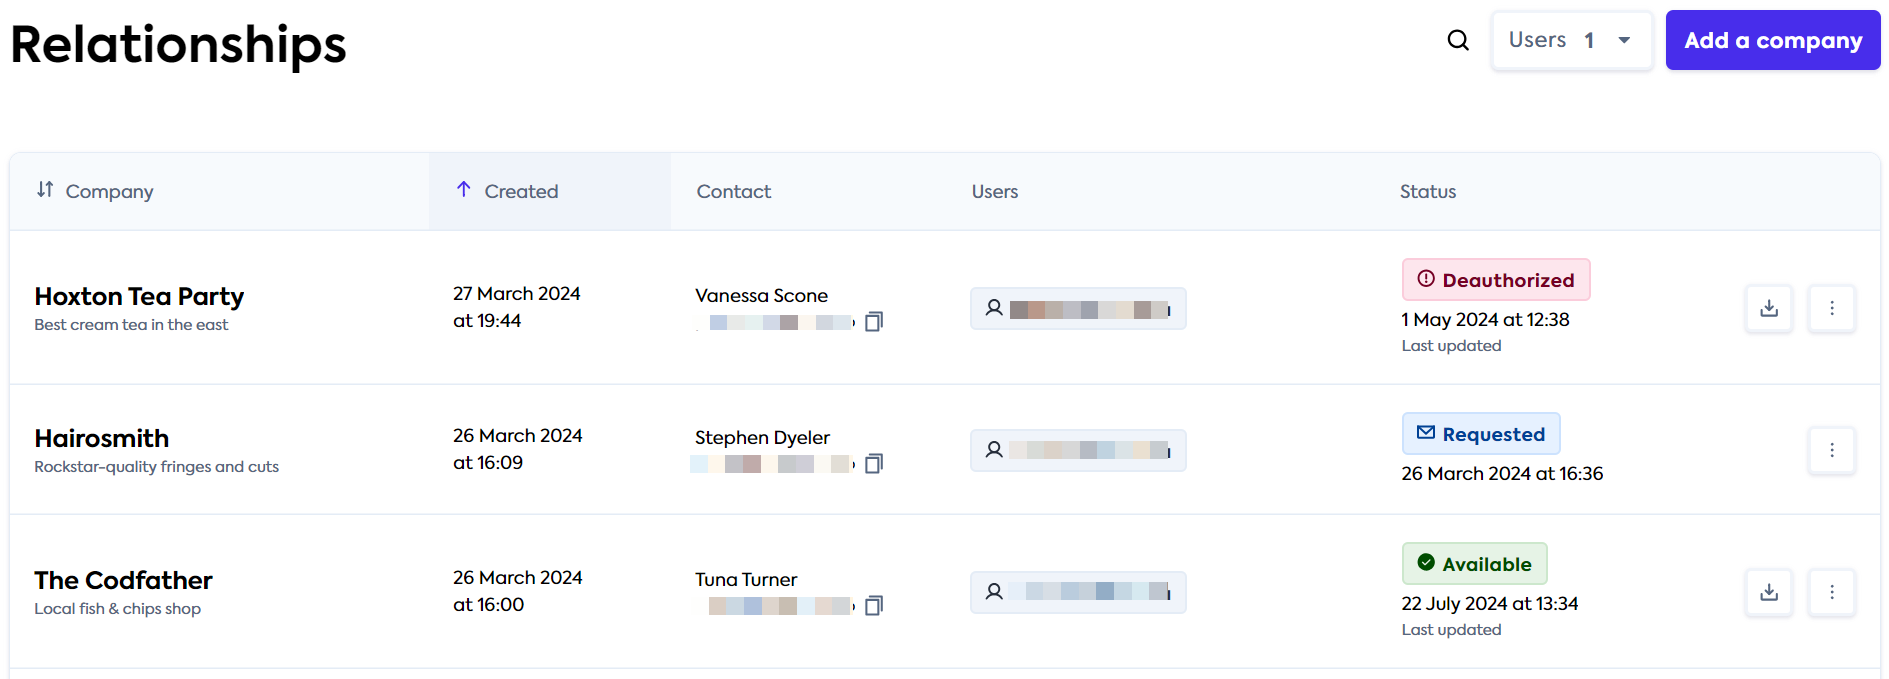
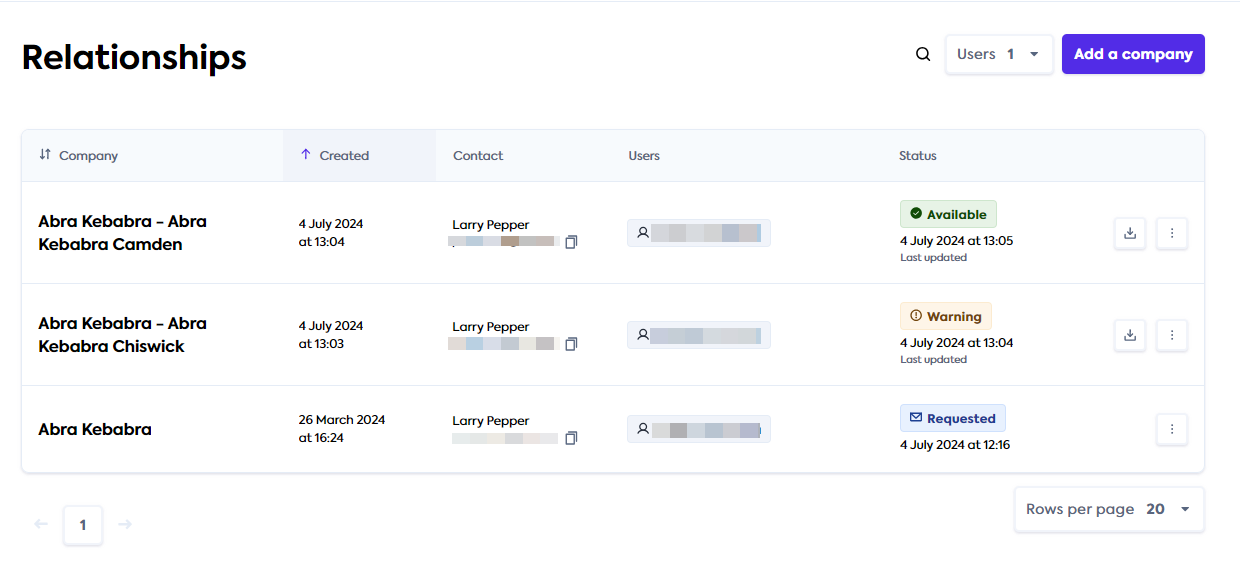
Our Relationship Portal is your one-stop shop to view the clients and relationships you are responsible for. Here, your organization's clients are represented as
In this guide, you will see the connection journeys your customer goes through when you send them a business data request.
Initial business data request
When you initiate a request for your customer's business data, you can ask them for one or both of these types of data:
Financials, which includes a profit and loss statement and a balance sheet statement enriched with our categorization feature.
Spend analysis, which provides accounts payable and supplier information to the level of individual transactions, payment methods, terms, etc.
We provide detailed guidance on requesting this data in our Request information guide.
Once you submit the information request, your customer will receive an email that will prompt them to authorize your access to their data. The content of this email will differ based on the type of data you selected.
For any type of information you requested, they will need to follow a software connection journey. If you requested spend analysis data, the customer will also go through multi-entity journey steps.
| Requested data type | Software connection journey | Multi-entity journey |
|---|---|---|
| Financials only | ✔️ | ❌ |
| Spend analysis only | ✔️ | ✔️ |
| Financials and spend analysis | ✔️ | ❌ |
Connection journey overview
You can see how multi-entity steps and software connection steps relate to each other on the diagram below.
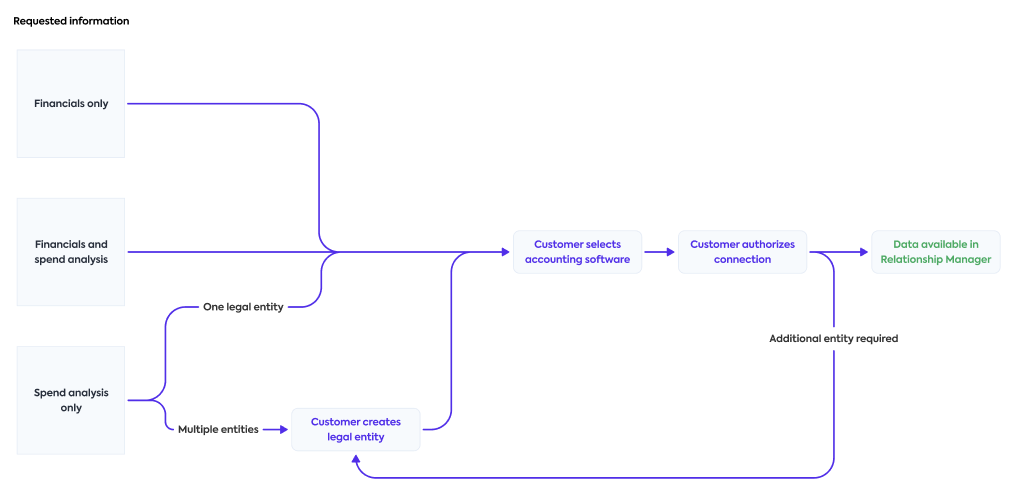
Next, let's review the details of these journeys.
Multi-entity journey
Your customer will receive an email when you request spend analysis data from them. To connect, they need to:
Click the link provided in the email.
The link will take the customer to the initial supplier information provision screen.
Alternatively, you can share this link with the customer directly. Choose Copy link instead of Request by email when requesting business information. You can learn more in our Request information article.
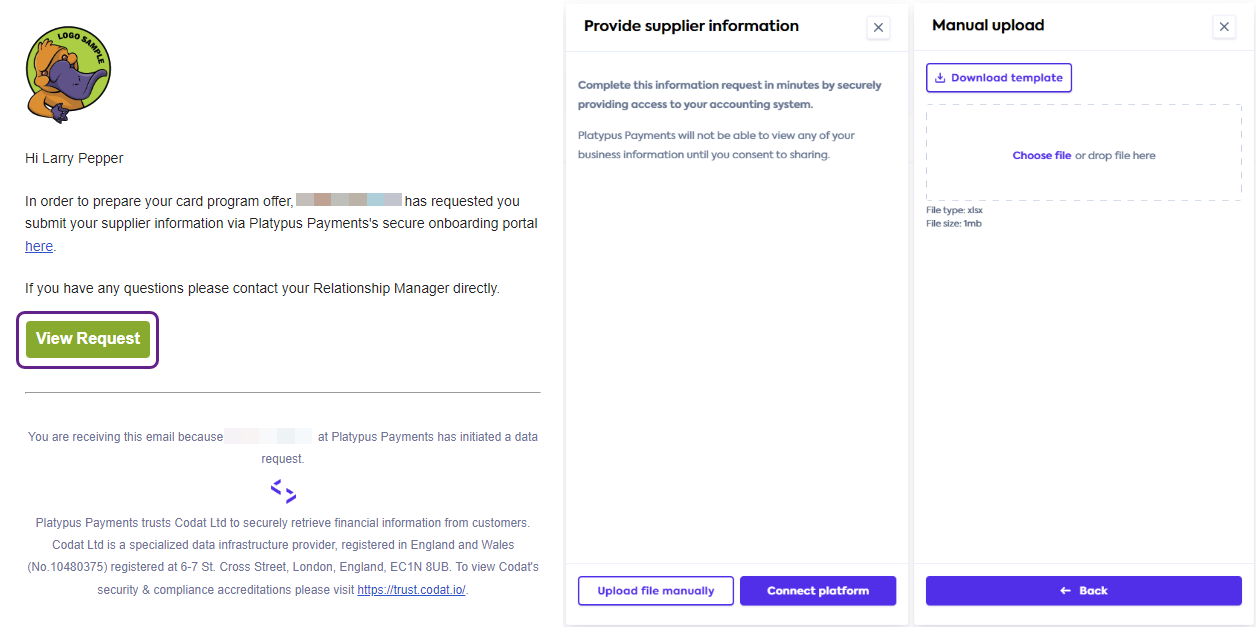
Choose the way they want to provide business data.
The customer can upload the data manually or connect their accounting software.
Upload the data manually, if required.
If they selected the Upload file manually option, the customer should download the supplier information template, fill it with their business data, and upload it on the Manual upload screen.
Don't see the Copy link button, manual file upload option, or the multi-entity flow? It is possible these functions weren't enabled for your Relationship Portal. Speak to your Codat contact to discuss enabling these.
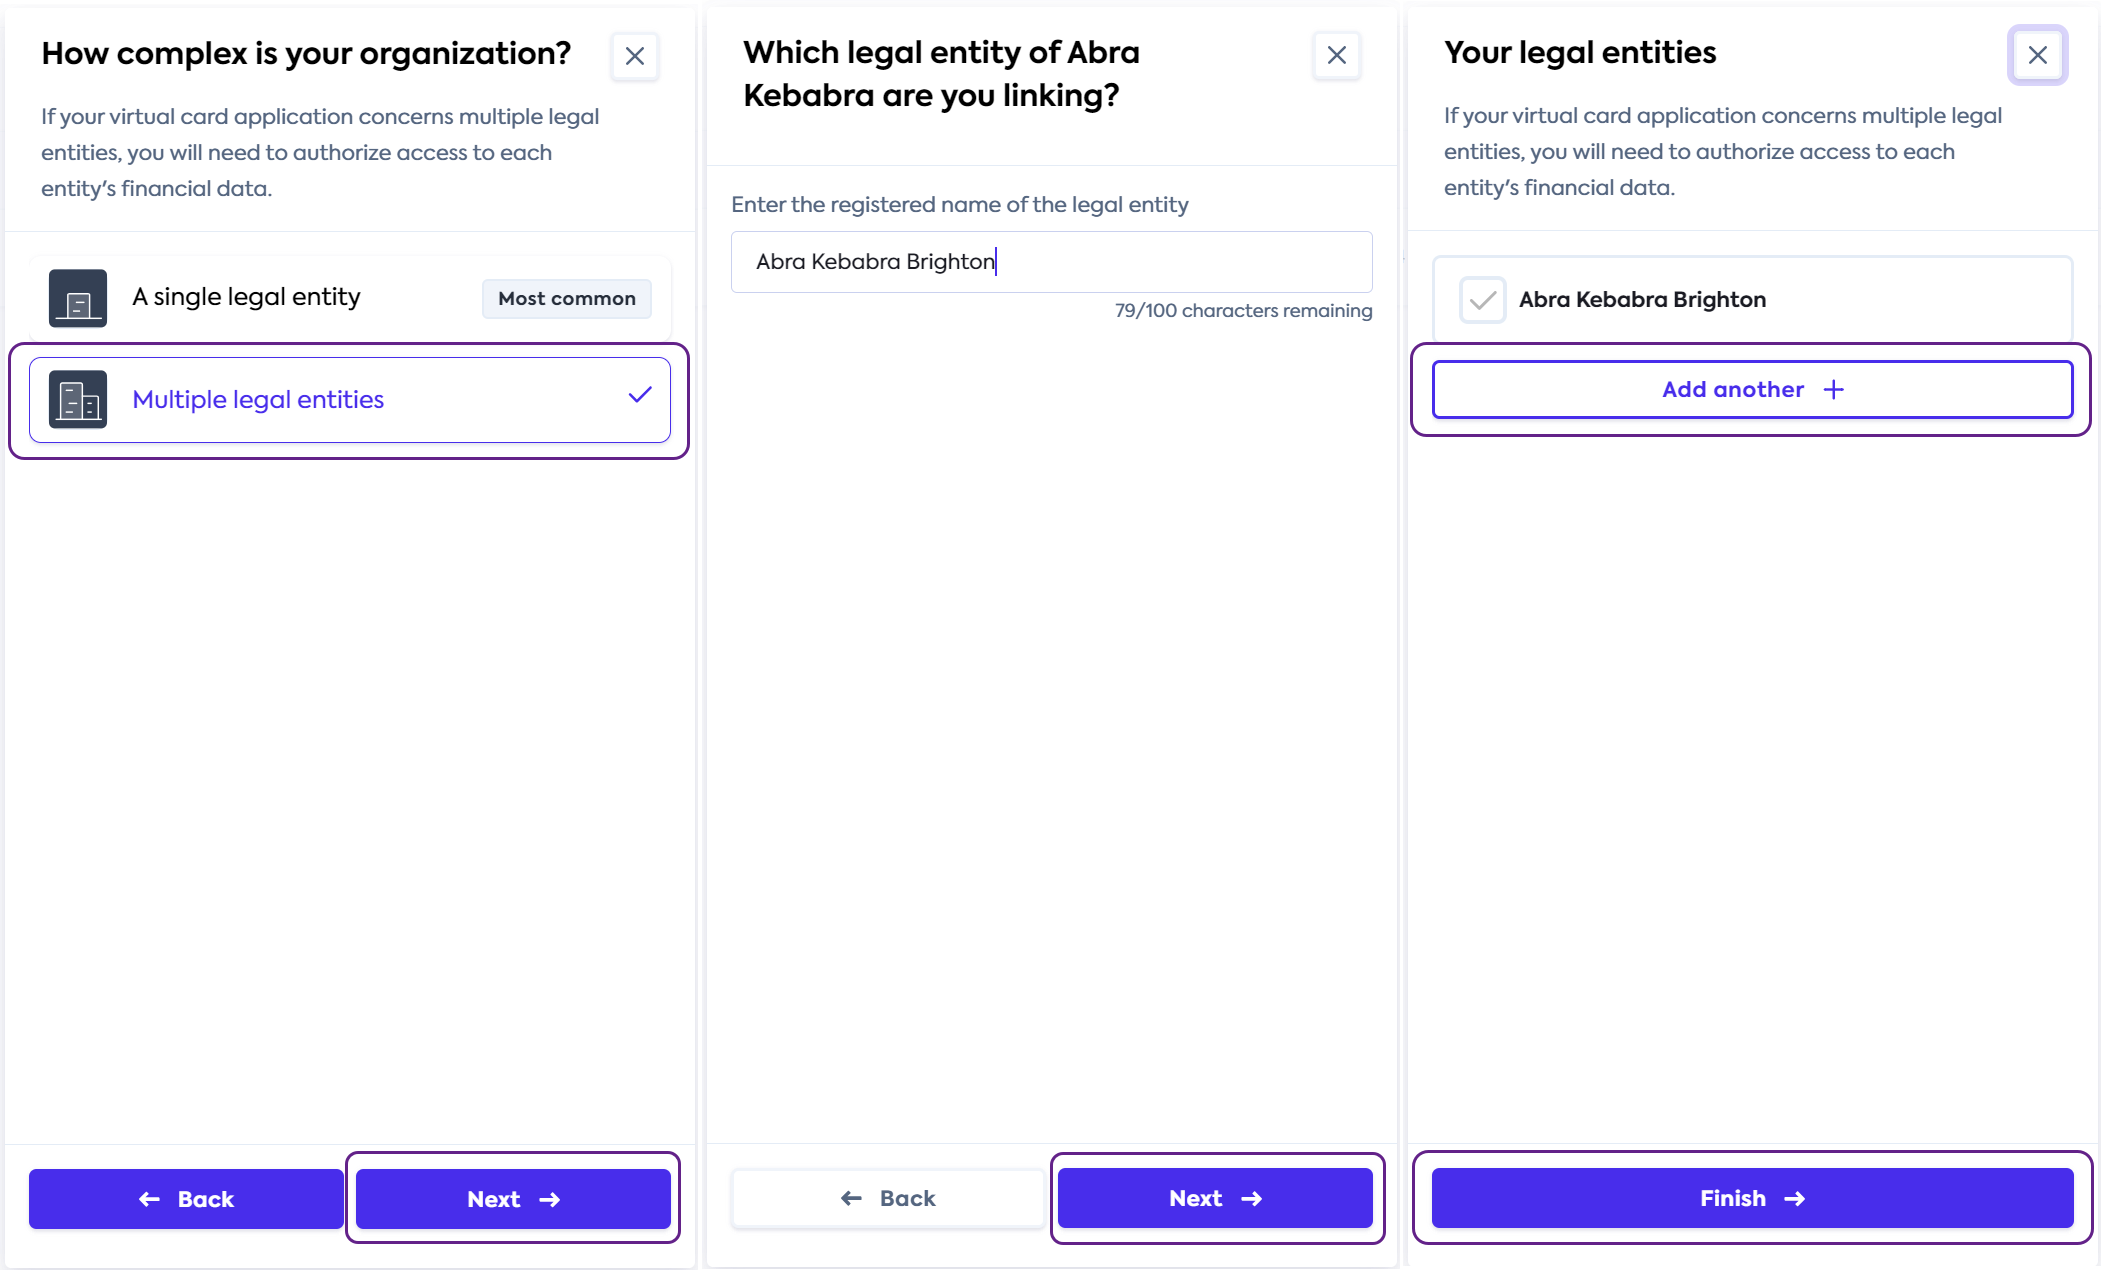
If the customer selects the Connect platform option to connect their accounting software, they will go through the multi-entity steps:
Choose the number of legal entities in the organization.
If a single entity is selected, the customer will move on to the software connection steps.
Provide the name of the legal entity.
Once an entity is added, the customer will move on to the software connection steps for the specified entity. Once connected, they will return to the entity flow to complete the next step.
Add another legal entity, if required.
If the customer adds another entity, they will repeat the previous step for this entity. Alternatively, they can choose to finish the flow.
Journey completion
Once the customer finishes the flow, they will see a summary view of their information request. Here, they can check the status of their request.

In the Relationship Portal, you will see the newly added entities and their information provision status.
Software connection journey
For any type of information you requested, your customer will have to authorize a connection to their accounting software. This will allow you to see their business data via Codat's Relationship Portal. The look, feel, and content of this journey depends on the settings selected by your organization.
If the customer is completing the multi-entity flow and chooses to connect their software, they will be directed to step 2 of this flow.
Your customer will receive an email when you request financials or financials and spend analysis data from them. To connect, they need to:
Follow the link provided in the email.
Alternatively, you can share this link with the customer directly. Choose Copy link instead of Request by email when requesting business information. You can learn more in our Request information article.
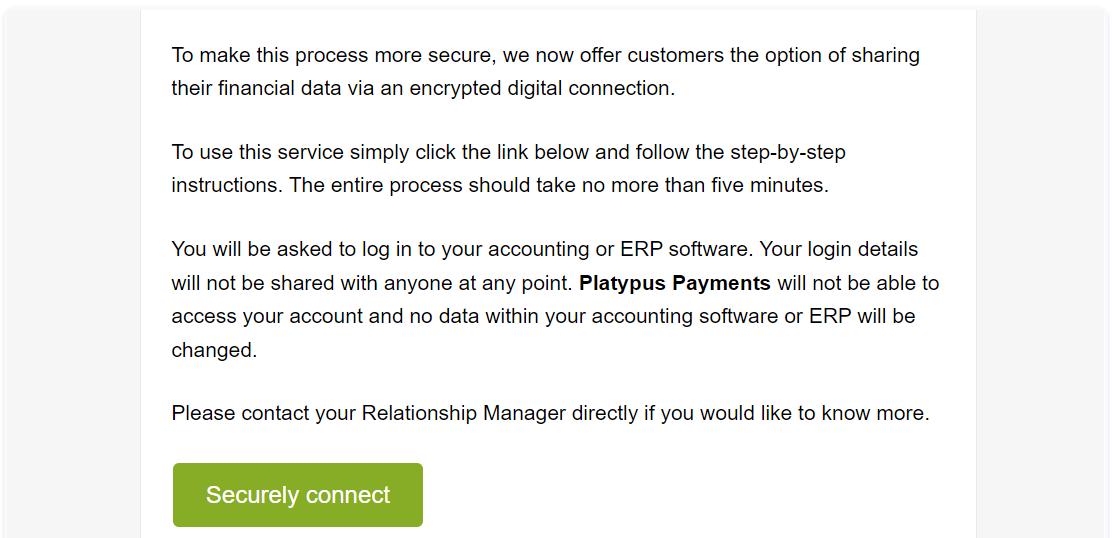
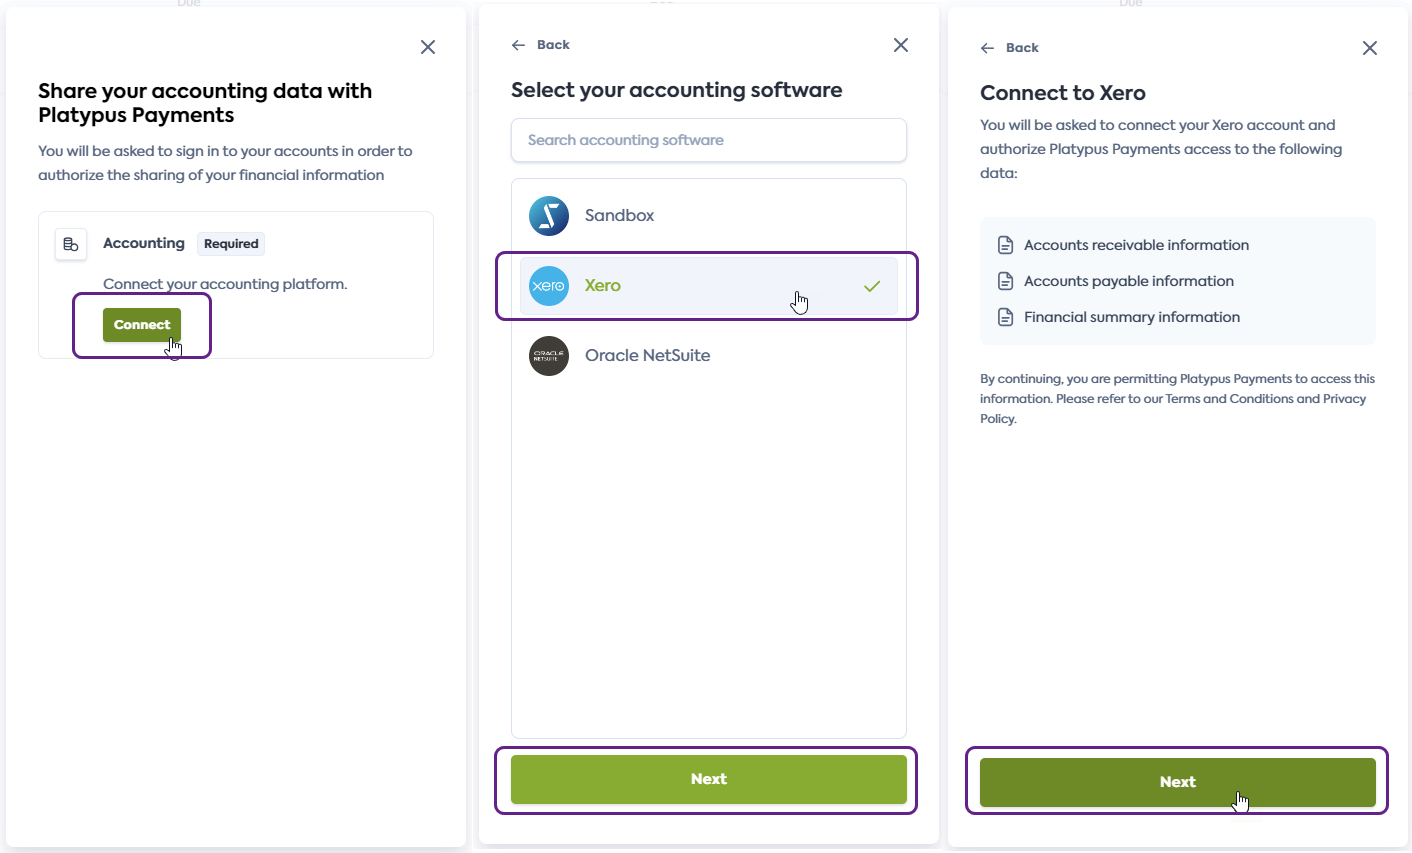
Choose to connect and link accounting software.
On the landing page, the customer should click Connect to initiate the software linking process.
Select accounting software.
Once the customer locates the software they use and want to connect, they should select it and click Next. In this guide, we use Xero.
Review data consent information.
The customer will see a consent screen where they can review what kind of business data your organization will be accessing.
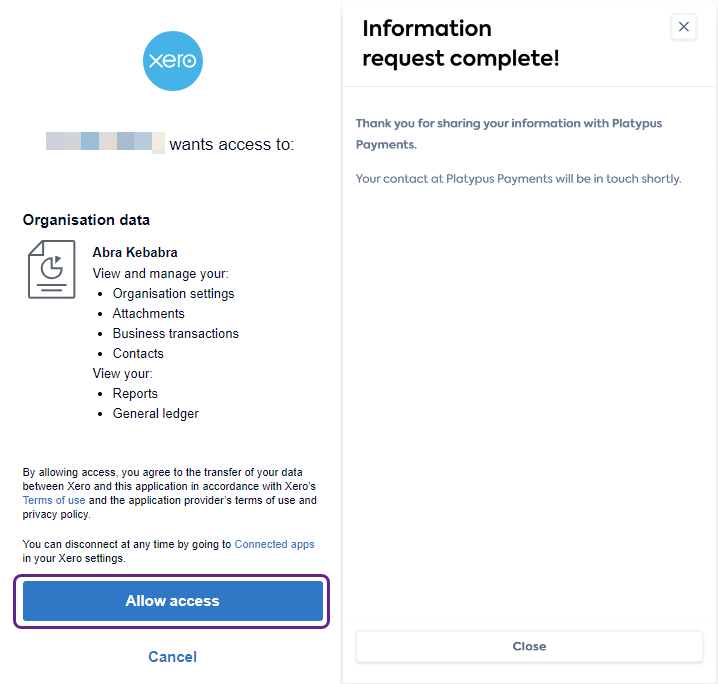
Enter accounting software credentials to authorize access.
The customer will be redirected to their accounting software to log in and authorize your access to their data. This step will look different depending on the software your customer uses.
Provide explicit agreement, if required.
The flow may include another step to confirm provision of access to the data, if required by the accounting software.
Complete the connection journey.
Your customer will be informed that the connection is complete and they can close the window.
Journey completion
Once the customer finishes the flow, they will see a summary view of their information request. Here, they can check the status of their request.
In the Relationship Portal, you will see the newly added entities and their information provision status.